Table of contents
No headings in the article.
Hey Guys 👋🏽,
So roughly a week ago, I was tasked with creating dummy data and consuming it with react and GraphQL.
While surfing the web for a quick and seamless approach, I stumbled upon Aws AppSync for the first time. And found it helpful hence decided to share it.
Prerequisites basic knowledge of AWS cloud should do.
AppSync, as defined by AWS, is a serverless GraphQL and Pub/Sub API service that simplifies building modern web and mobile applications.
AWS AppSync GraphQL APIs simplify application development by providing a single endpoint to securely query or update data from multiple databases, microservices, and APIs.
Now you get the gist? So let's dive in.
The first step is to sign in to your AWS cloud account, and if you haven't created one, you can sign up. Kindly note you would be requested to input your card details in other for AWS to verify your account.
You can easily search through the search bar at the top left corner of the app bar with the keyword AWS AppSync. You would see a prompt to create an API.
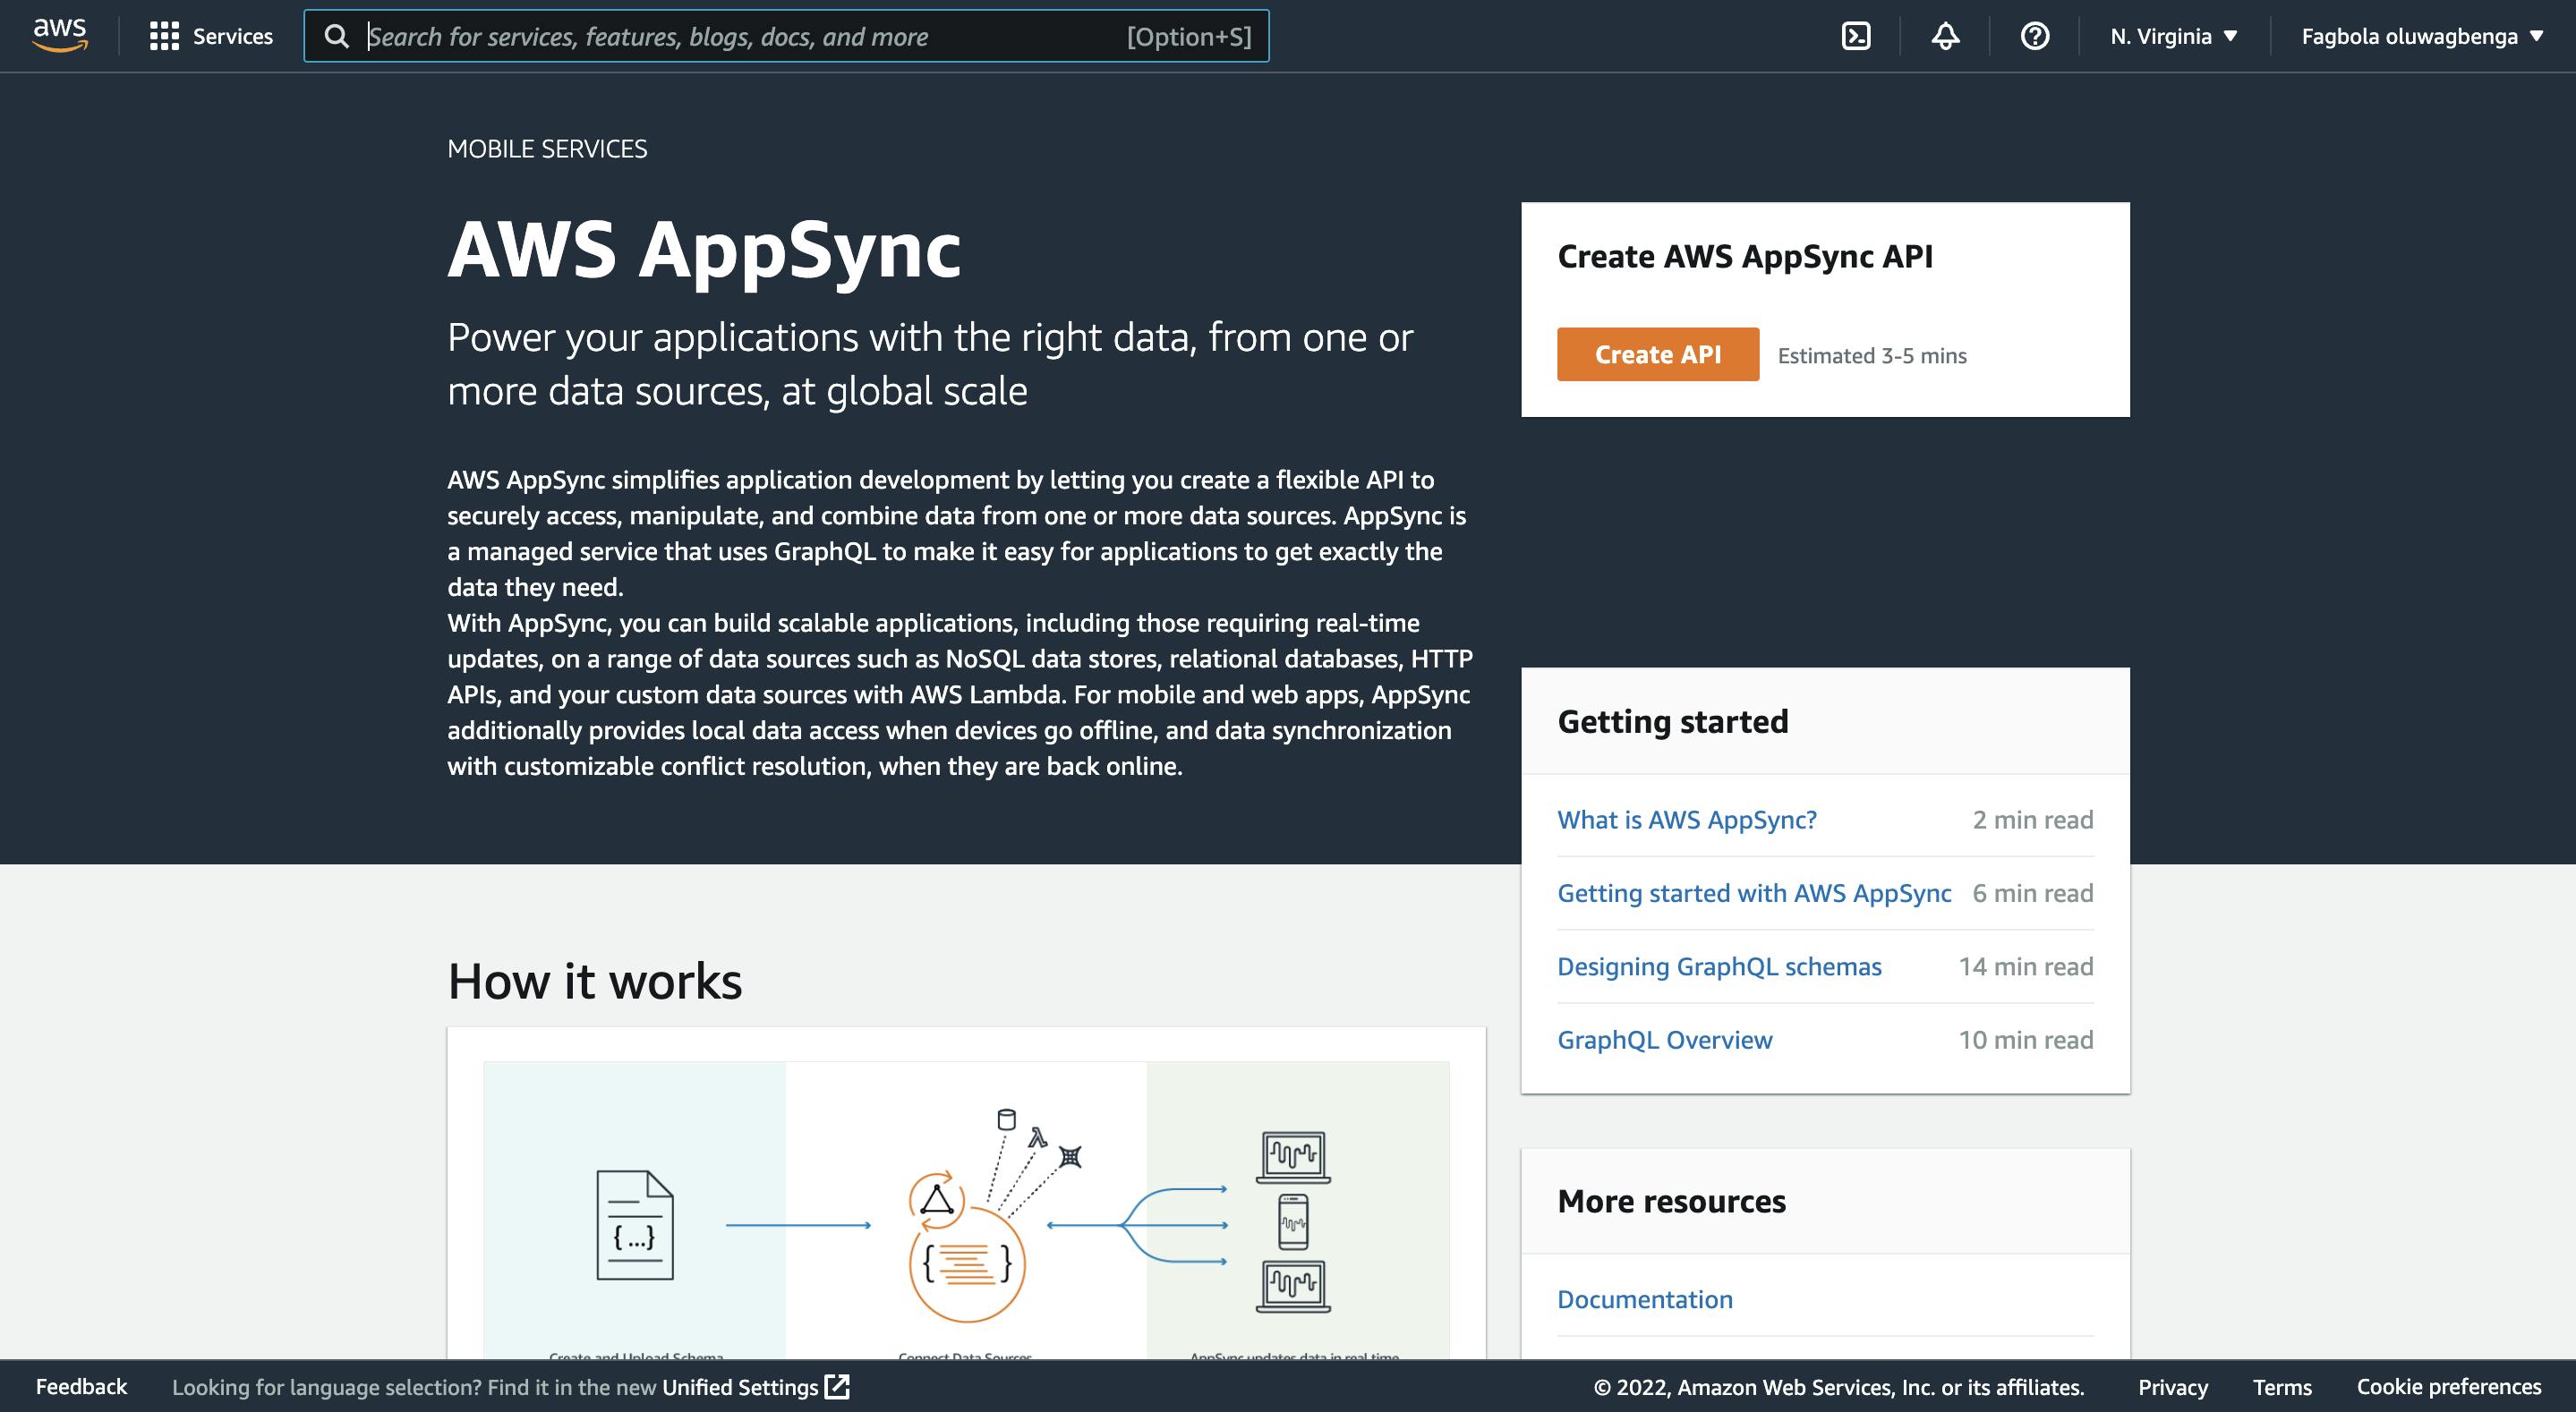
Then by the dashboard, you would get multiple ways/options towards creating an API. I urge you to browse through all for a better understanding of what might best fit your intended use case.
For this tutorial, I would be working with the Create with Wizard option.
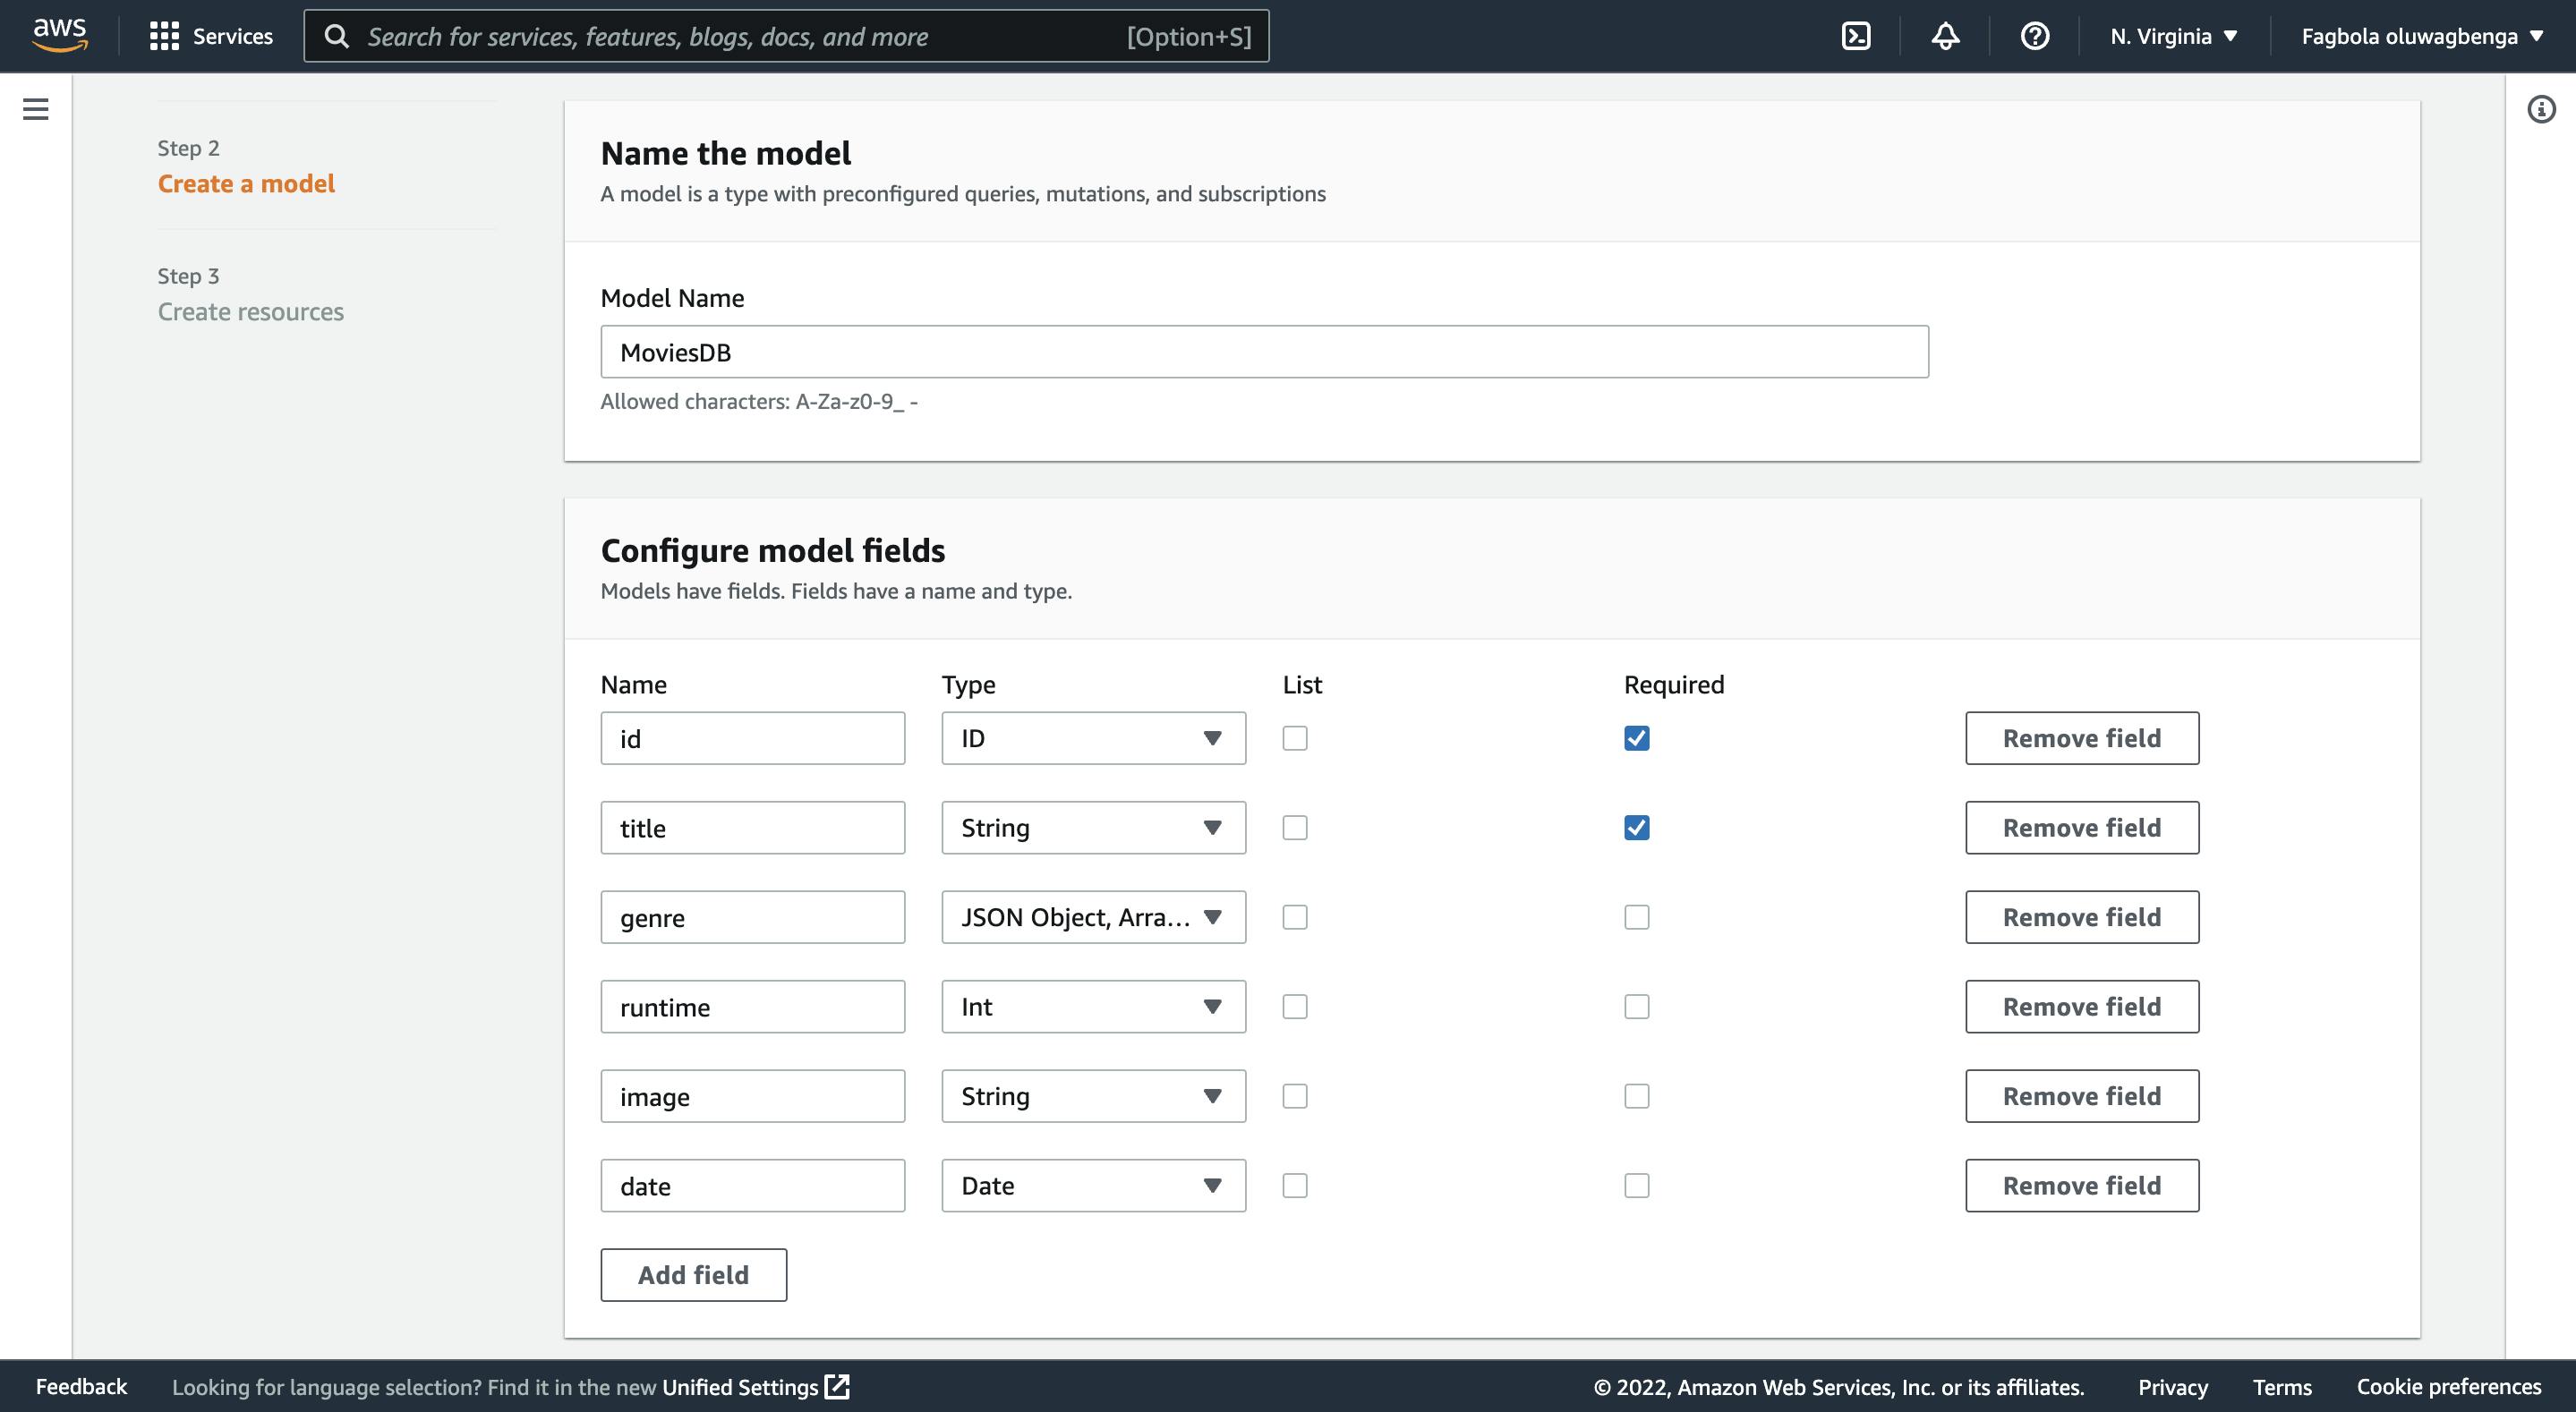
So we would go ahead by giving it a model name for this, I would call it MovieDB. Then I would configure the model field, by entering all necessary data fields and their corresponding type. By the side, you can get to see how we ensure the data is required. which is an equivalent of id: ID! or title: String!. this easy-to-use input and drop-down form fields help eliminate user error to the barest minimum.
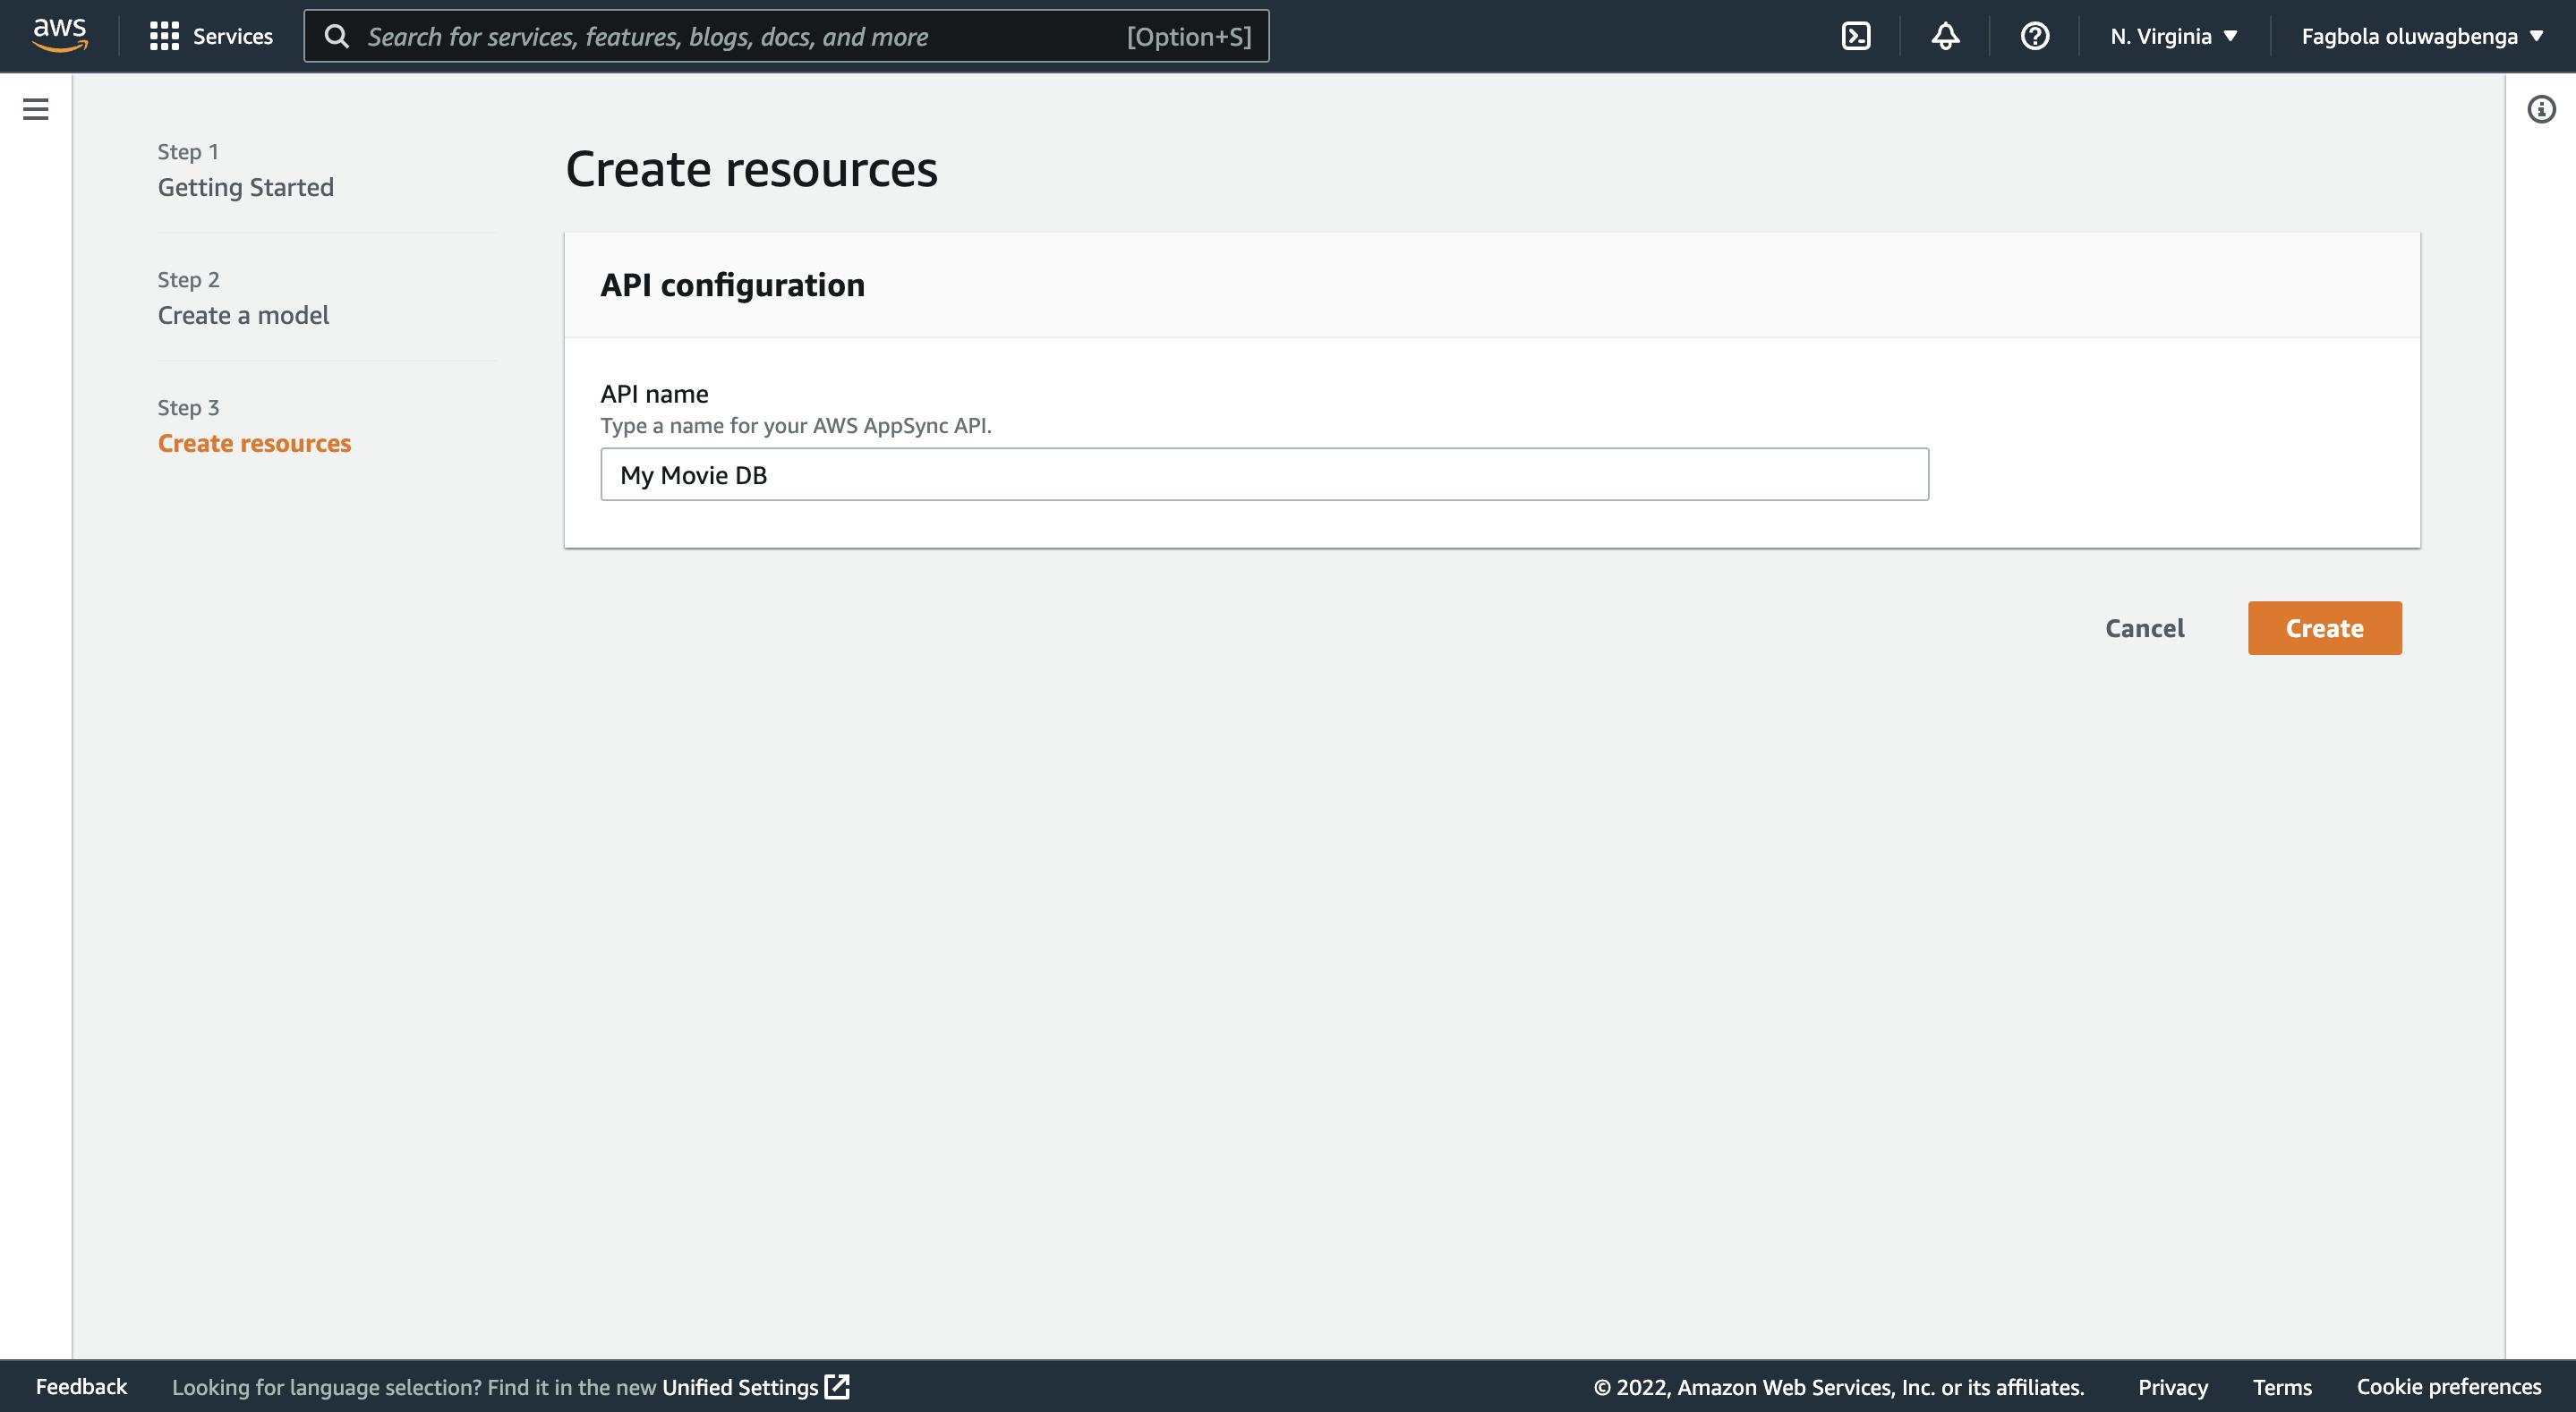
then we move to the 3rd stage of naming our API and then click create. It would instantiate a dynamo DB for us.
Below is the resultant schema generated for us. just imagine the time saved from writing the code below without the elimination of human error 😩.
type MoviesDB {
  id: ID!
  title: String!
  genre: AWSJSON
  runtime: Int
  image: String
  date: AWSDate
}

type Query {
  getMoviesDB(id: ID!): MoviesDB
  listMoviesDBS(filter: TableMoviesDBFilterInput, limit: Int, nextToken: String): MoviesDBConnection
}

type Mutation {
  createMoviesDB(input: CreateMoviesDBInput!): MoviesDB
  updateMoviesDB(input: UpdateMoviesDBInput!): MoviesDB
  deleteMoviesDB(input: DeleteMoviesDBInput!): MoviesDB
}

type Subscription {
  onCreateMoviesDB(id: ID, title: String, genre: AWSJSON, runtime: Int, image: String): MoviesDB @aws_subscribe(mutations: ["createMoviesDB"])
  onUpdateMoviesDB(id: ID, title: String, genre: AWSJSON, runtime: Int, image: String): MoviesDB @aws_subscribe(mutations: ["updateMoviesDB"])
  onDeleteMoviesDB(id: ID, title: String, genre: AWSJSON, runtime: Int, image: String): MoviesDB @aws_subscribe(mutations: ["deleteMoviesDB"])
}

input TableMoviesDBFilterInput {
  id: TableIDFilterInput
  title: TableStringFilterInput
  runtime: TableIntFilterInput
  image: TableStringFilterInput
  date: TableStringFilterInput
}

input CreateMoviesDBInput {
  title: String!
  genre: AWSJSON
  runtime: Int
  image: String
  date: AWSDate
}

input UpdateMoviesDBInput {
  id: ID!
  title: String
  genre: AWSJSON
  runtime: Int
  image: String
  date: AWSDate
}

input DeleteMoviesDBInput {
  id: ID!
}

type MoviesDBConnection {
  items: [MoviesDB]
  nextToken: String
}

input TableStringFilterInput {
  ne: String
  eq: String
  le: String
  lt: String
  ge: String
  gt: String
  contains: String
  notContains: String
  between: [String]
  beginsWith: String
}

input TableIDFilterInput {
  ne: ID
  eq: ID
  le: ID
  lt: ID
  ge: ID
  gt: ID
  contains: ID
  notContains: ID
  between: [ID]
  beginsWith: ID
}

input TableBooleanFilterInput {
  ne: Boolean
  eq: Boolean
}

input TableIntFilterInput {
  ne: Int
  eq: Int
  le: Int
  lt: Int
  ge: Int
  gt: Int
  contains: Int
  notContains: Int
  between: [Int]
}

input TableFloatFilterInput {
  ne: Float
  eq: Float
  le: Float
  lt: Float
  ge: Float
  gt: Float
  contains: Float
  notContains: Float
  between: [Float]
}
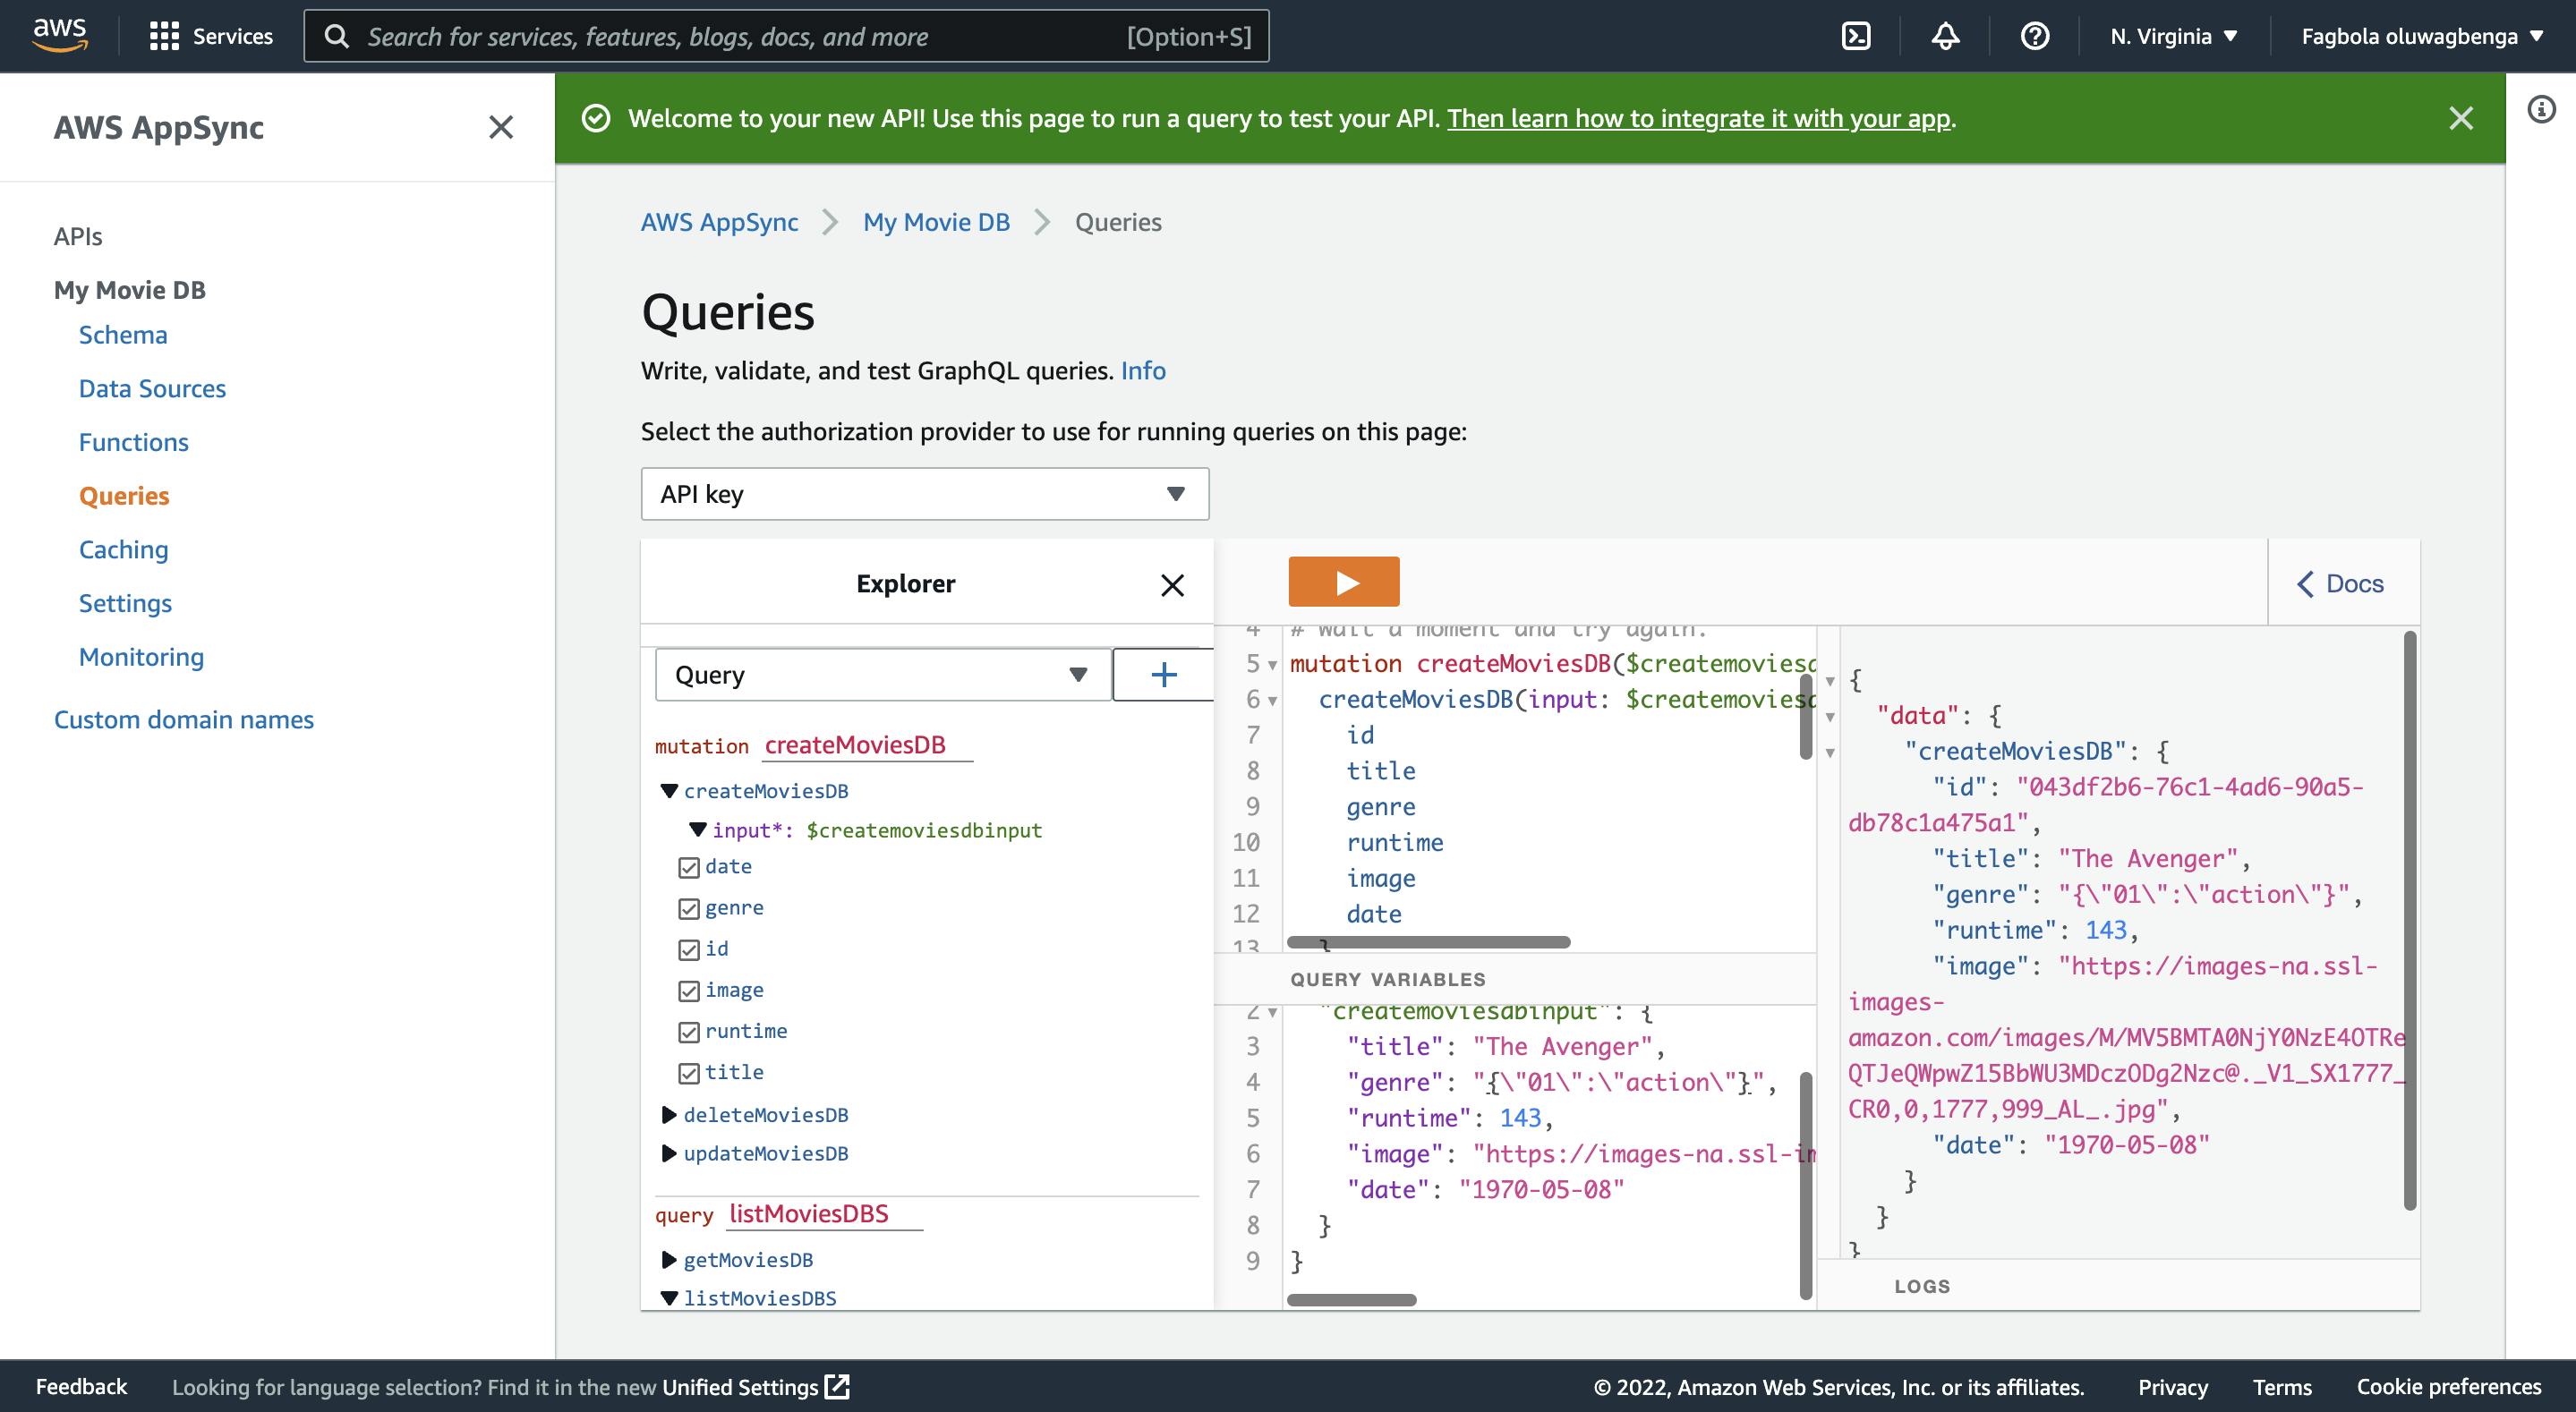
We can seamlessly make queries and test our APIs. as shown below
We can integrate with any app by downloading the respective config as shown below.
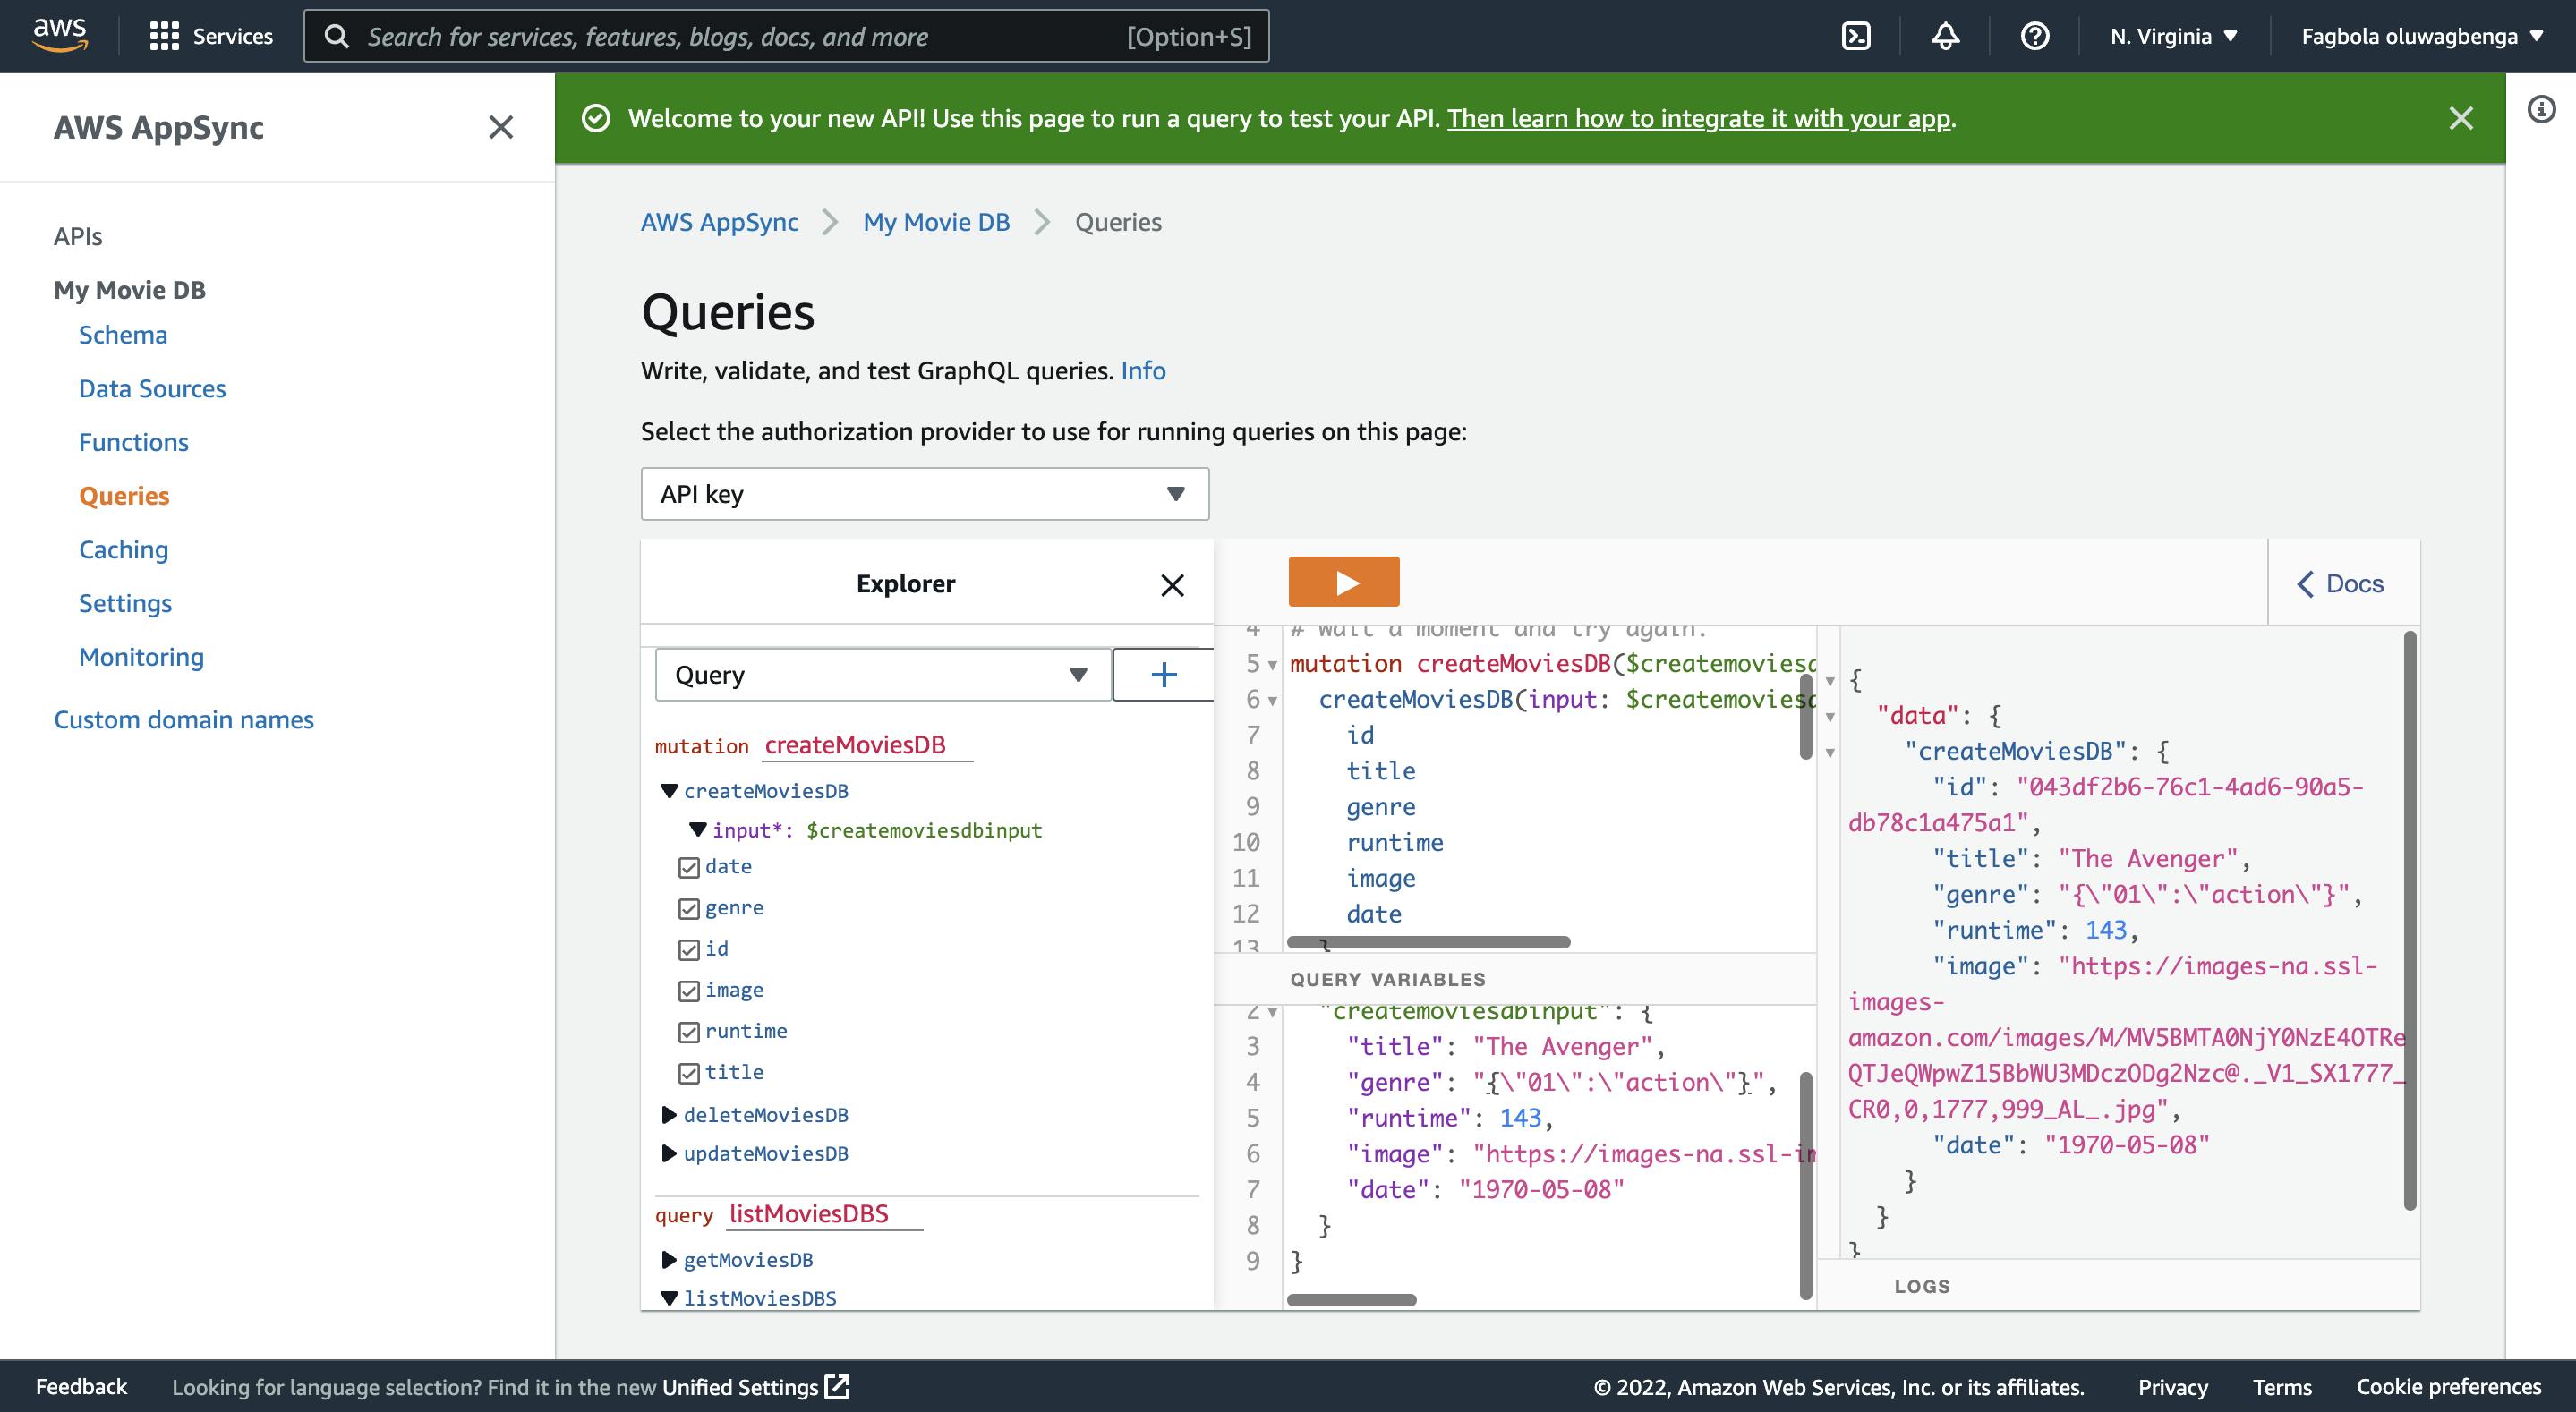
Let me stop here and continue on a later integration with React. kindly stay tuned with the screenshot - teaser 😊.
